It’s Time To Start Your Seeds Indoors –
Admin • May 31, 2019

If you’ve been waiting for the perfect time to start your garden, this is it. It’s time to start seeds indoors so they’ll be ready to plant outside when spring begins in earnest. It’s a fun project to get you through the late winter period that’s really all about waiting for spring to finally come calling.

Growing your own – whether flowers or vegetables – can be uniquely satisfying. Planting your seeds with care, then checking for that very first sprout everyday in anticipation is exciting. When you finally plant the first one in your spring garden – especially for the very first time – you’ll feel the pride of accomplishment.
Unfortunately, you don’t always reap what you sow – it’s simply not always as easy as it looks. When success is your goal it’s most important to consider the different needs of each type of seed. They don’t all have the same conditions for germination so be sure to read and follow the directions on the back of each seed packet.
In general, the bigger the seed – the deeper you planted it. Very small seeds, like lettuce seeds, don’t really need ‘planting’ at all – just a thin dusting of soil. That’s one of the very few generalities though, seeds have widely varying needs from light exposure to optimal temperatures. Some seeds can take weeks to show signs of growth, while others will germinate in just a few days.
You may be wondering how nature seems to germinate seeds so seemingly effortlessly. First, while you may plant 20 seeds, countless billions are spread in nature and not all of those will germinate either. Mother Nature also has some tricks on her side that you don’t – like counting on animals and birds to help out. The seeds of fruit eaten by birds run through it’s digestive system, which helps to weaken the tough coats of some seeds.* Animals wander – and birds fly – far away from the parent plant and disperse the seeds in their droppings, while others fall from their feathers or feet. Some seeds are sticky, while others have hooks or barbs that catch onto an animal’s fur, feathers or skin.
Seed Germinating Methods
For the home grower there are many germination methods, and experienced growers usually have one particular method for starting seeds indoors that they they swear by. Let’s explore a couple of the most popular.
The ‘Mini Greenhouse’ Kit

The first method that comes to mind is generally that seed starter kit you’ve seen in stores. These plastic planting trays usually include small pop-out cells that you fill with soil and set in a base tray. Then you plant your seeds and cover the tray with the clear plastic dome to create a small greenhouse which maintains the proper humidity level – then watch them grow. When your seedlings are ready to transplant – usually after it’s developed 3 or more leaves – you simply pop the individual plants from the container, and they’re ready for replanting in a larger pot or in your garden.
You can also use the small biodegradable germinating pots which have the advantage of allowing you to simply plant the entire pot. This method eliminates the risk of breakage or shock in digging them out of the growing cell for planting. The plant’s roots will grow right through the pot which will biodegrade over time. Keep an eye on this type of pot though, they are susceptible to mold. Be sure to space them out so air can pass between them.
Don’t use just any soil either. You can purchase a mixed seed starter soil to make it easy, or create your own. Balcony Garden Web
has a few different recipes to choose from.
Paper Towel Seed Germination Method

The paper towel method is very simple. All your need is a square of paper towel, water, and a plastic ziplock bag, food storage container (with a clear lid) or cling wrap and – of course – seeds.
- Rip off a square of decent quality paper towel (something that can hold its shape when moist and not fall apart).
- Wet the paper towel and then squeeze it so it’s not dripping but moist.
- Place your seeds on the paper towel and fold it l over.
- Put folded paper towel in ziplock bag, storage container, or cover in cling wrap.
- Place on sunny window sill.
- Check progress in 3 – 5 days, though some varieties of seeds take much longer (refer to package directions).
Once the seeds have sprouted roots you can proceed to plant them in your starter soil. Some seeds may become embedded in the paper towel, but not to worry. Just plant the seed – paper and all – in your soil, it too will biodegrade over time and you won’t risk tearing the root from the seed.
Other Considerations
*Scarification
Some seeds come with a tough outer coating that is very difficult for a growing root to break through. While seeds get treated roughly in nature, being rubbed against rocks or falling from a height, collected seeds are treated in a more gentle manner. This won’t allow water to penetrate the outer shell to start the germination process. Scarification is the method by which gardeners slightly damage the outer coating of a seed to allow the moisture easier access to the interior. Scrape the outer shell with sandpaper or a nail file, or nick the seed with a sharp knife before planting it in soil. Soaking the seed in water for 24 hours can make scarification easier.
Temperature & Light
While most seeds need warmth to sprout – the top of your refrigerator will usually suffice – heat mats are available for purchase for more accurate control. Light needs for germinating vary as well – most seeds need varying degrees of light, but some actually prefer little or no light at all.
“Hardening Off”
Once spring has come- you won’t want to take your sprouts straight from the house into the garden. They need a little time to acclimate before being planted out. Take them outside on warm days for increasing time periods of exposure – out of direct sun – and take your time moving them from shade to dappled sunlight and finally to full sun. This will avoid the often fatal shock of an extreme change in temperature and light.
Last but not least – it cannot be stressed too strongly that you should read the back of seed packets and heed the directions. All seeds are not created equal! Good luck with growing your own, and know that spring is on it’s way.
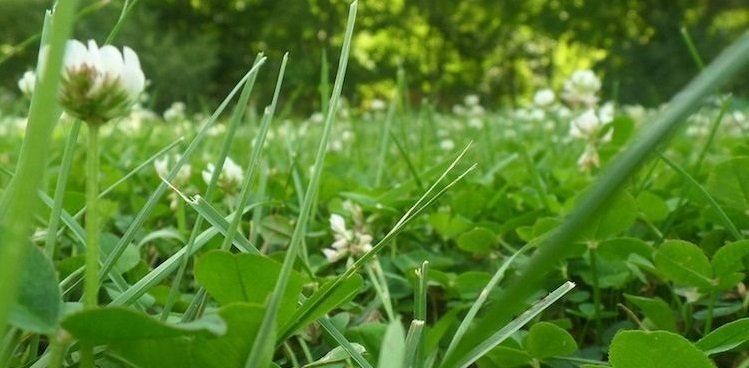
A thick, lush, healthy lawn!

Probably not with silver bells and cockleshells*, considering there aren’t any sandy beaches in central Kentucky 😉

Tired of muddy paws and patchy lawns?
Tired of muddy paws and patchy lawns?

February 15, 2019 Lexington, KY – Mow Mow’s Landscaping is proud to announce that it has earned the home service industry’s coveted Angie’s List Super Service Award (SSA) for the second year in a row! This award honors service professionals who have maintained exceptional service ratings and reviews on Angie’s List in 2017 & 2018. “The service providers that receive our Angie’s List Super Service Award demonstrate the level of excellence that members have come to expect,” said Angie’s List Founder Angie Hicks. “These pros are top-notch and absolutely deserve recognition for the trustworthy and exemplary customer service they exhibited in the past year and overall.” Angie’s List Super Service Award 2018 winners have met strict eligibility requirements, which include maintaining an “A” rating in overall grade, recent grade and review period grade. The SSA winners must be in good standing with Angie’s List, pass a background check, record a current trade license attestation and abide by Angie’s List operational guidelines. “Mow Mow’s goal has always been to exceed our customer’s expectations in quality of work, professionalism and promptness of service. It is an honor to receive this reward and be recognized for attaining this goal for the 2nd year in a row.” – Jennifer Medrano, Owner Mow Mow’s Landscaping has been listed on Angie’s List since 2017 when the company was first launched. This is the second time Mow Mow’s Landscaping has received this honor. Service company ratings are updated continually on Angie’s List as new, verified consumer reviews are submitted. Companies are graded on an A through F scale in multiple fields ranging from price to professionalism to punctuality. For over two decades Angie’s List has been a trusted name for connecting consumers to top-rated service professionals. Angie’s List provides unique tools and support designed to improve the local service experience for both consumers and service professionals. ### For over two decades, Angie’s List has provided trusted reviews and information to help millions of consumers make smart hiring decisions. Angie’s List offers more than 10 million verified reviews in over 700 service categories, providing its members a credible resource for researching and comparing local service providers. Angie’s List is based in Indianapolis, Indiana and is an operating business of ANGI Homeservices (NASDAQ:ANGI). Contact: Steffanie Finkiewicz Angie’s List 303-963-8384 mediarelations@angieslist.com You can check out Mow Mow’s Angie’s List reviews here .
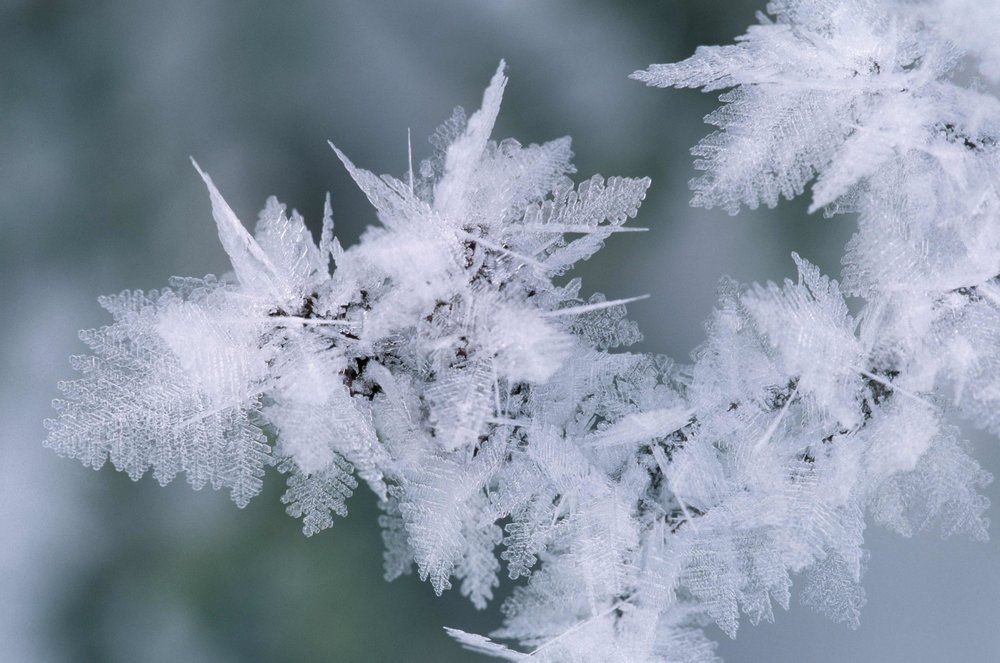
With this record setting cold, central Kentucky is experiencing what’s known as a ‘hard freeze.’ But what exactly defines a hard freeze? –
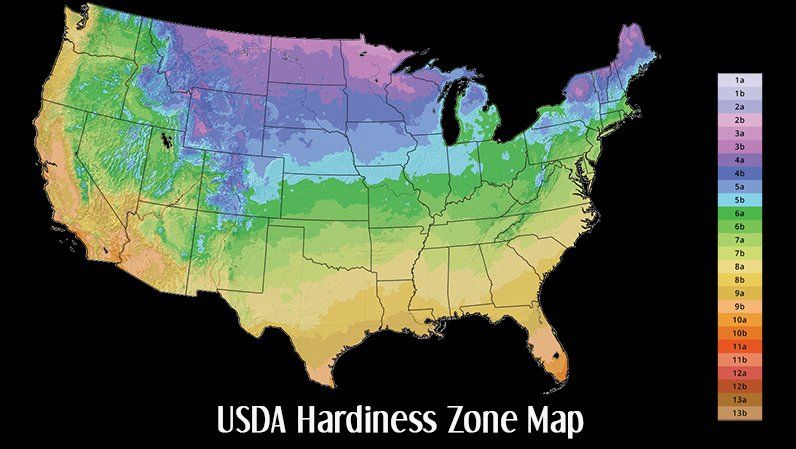
here’s plenty of time before spring comes a long, but it’s always fun to look through magazines like Southern Living at the beautiful gardens and landscapes featured there. They’re always lush and thriving, often filled with unique plants and flowers you may have never seen before. But before you start pining for that unusual flora, there are several factors to consider if you want to be successful in having the gardens of your dream. The four most important are sun, soil, water and zone – these factors are the key to having that green thumb. Unfortunately, you can’t count on a plant’s label to give you the whole story, it’s a generalization at best.

Rose budding early

Happy New Year! With the beginning of 2019 here upon us, it’s time to start preparing your landscape to look its best in the spring. While it is easy to hide away from the cold winter weather here in central Kentucky, be sure to spend some time in January and February knocking out some simple yard work- beyond taking down the decorations you put up for the holiday season. Not sure where to start? Here are a few helpful suggestions:

Ice melting products can damage your landscape. Rock salt is by far the leader in causing landscape damage both in the soil and via wind driven salt spray.